VOTE NOW for the LEGO Sutton Hoo Helmet on LEGO Ideas
King Raedwald needs your vote!
Woohoo! The Sutton Hoo Helmet has been approved by LEGO Ideas and you can now vote for it and (hopefully) make it happen! Click the vote button below and vote, then come back and read how I built the helmet!
All done? Thank you so much, you’ve helped make the 1500-year-old Sutton Hoo Helmet one step closer to being an actual set!
How I made the (wearable) LEGO Sutton Hoo Helmet
This short video for LEGO Ideas explains how I made the helmet. I had to omit some things to meet their Terms and Conditions, which is fine. However, on this site I can go into a bit more specific detail as well as compare the build to the original.
How do you start to build a helmet? Well, you look at people who’ve done it before.
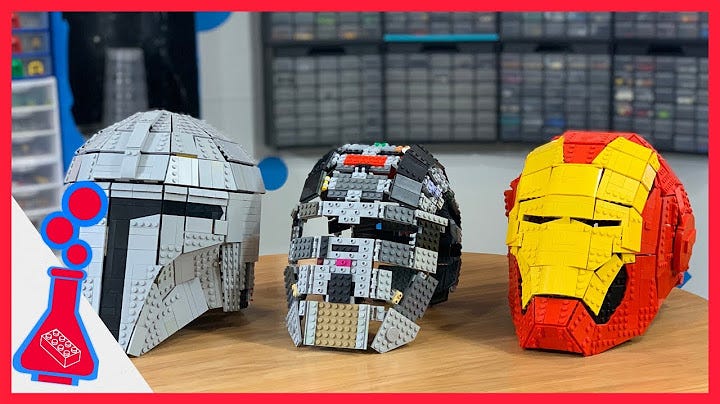
Nick Brick, and subsequently others like Brick Science, use a method that produces a very smooth, close-fitting helmet. It starts with a base of plates held with mixed joints, onto which you fit 2x4 stepped curved slopes positioned with jumpers.
Secondly, the earpieces tend to sit proud of the main helmet shape and, in most cases change direction. It’s a really good technique if you’re looking to build a superhero or sci-fi style helmet, as you get that snug fit, with the pieces fan out in a loose arch from the ear segments.
Ben Caulkins, meanwhile was building Halo’s Master Chief helmet (and full costume!) as far back as 2011, which is even more impressive when you realise that LEGO only introduced mixed joints in 2014.
Perhaps the closest sci-fi helmet LEGO build to it would be LEGO Admiral’s wearable Darth Vader helmet from 2017.
A different type of helmet
The Sutton Hoo helmet has a high central arch or ridge, made of iron, which I assume was to take the brunt of any top down hacking blow from a sword. It’s also bigger and sits higher from the top of the head, more like an old British style firefighter’s helmet which was designed to stop falling blows from hitting the head and neck.
There’s plenty more history on firefighter’s helmets on Essex Fire Fighter’s website, but this line is key to their design. James Braidwood, Superintendent of the Edinburgh Fire Engine Establishment realised that “falling slates and roof tiles could cause severe head injuries similar to a blow from a cavalry sword”. Sadly Braidwood was killed in the huge Tooley Street fire of 1863 when a wall collapsed on him.
Today, modern firefighter PPE and helmets are actually more like superhero helmets, fitting close to the head, and with a smaller central crest. The Rosenbauer helmet used by the London Fire Brigade comes with a built-in head torch, thermal imaging camera attachment, eye protection and loads of other features.
I also studied some of the other helmets from the time, looking at their size, shape and overall head fit.
Building phase
At first, when trying to just understand how to build any helmet from LEGO I followed and tried to adapt the superhero production technique. The result was something that I could put on my head, but it didn’t look or feel like the Sutton Hoo helmet.
After several failed attempts I changed tack and began with a circumference around the head of 4x6 plates held with hinges and mixels joints, and with a central arch over the head.
I then built down from the central arch to over the ears, and joined those pieces together. At this point, the build was incredibly fragile, and constantly putting it on and off my head was causing me and it some stress! So I bought a dummy head and began using that.
By now the build was holding together a lot better. You can see in this photo where I was playing around with the eyebrow pieces. I tried lots of different ways to make the eyebrows feature 1x1 trans red plates, but because they change shape in two directions – both arching vertically like a rain bow and horizontally round like a car bumper, it just became too unwieldy. Also, I needed to think about the wild boars at each end too.
Who knows, if the model goes ahead the might of the LEGO Design team might be able to crack this one. But there’s a point in a project where if you obsess over one detail, you lose sight of the bigger picture. Worse, you can get dishearten and give up.
Making the face
Having got a bowl-like helmet shape that didn’t fall apart, I turned my attention to the face. The face mask is one of the more detailed parts of the helmet. With interwoven lines raining down the face crossed by two horizontal cheek stripes – more on those in a moment. These reminded me of the ‘eye black’ that NFL footballers use to reputedly deflect glare. Though it doesn’t work, players still use it because it’s effectively war paint. I wonder if the intention was the same for the helmet?
After tinkering with a few designs, this image shows the first time I’d made significant progress on the face. Key to that was using the balloon pieces as eyebrows, and the 4x4 macaroni curves under the eyes. I wanted to keep the face as flat as possible, so it’s no thicker than 3 plates or one brick thick, and is often thinner in most places.

I’m please with the moustache piece. the 2x4 curved plate looks like it’s made for it, all it needed was some gold curved plates and bingo. One thing that isn’t clear from online sources is if the mouth has a hole in it to breath. I read somewhere that the nose has two nostril holes, but the only mention specifically about the mouth was that it amplified the voice. In the heat of battle being able to shout commands coherently is crucial, being able to breath is also good!
The conical visors found on knight’s helmets were designed to increase ventilation, but they wouldn’t be invented until around the 1330s, that’s over 600 years after the Sutton Hoo helmet.
Slowly the build came together. I found I’d have spells of frantic quick progress, countered by going back and refining details and swapping things out for better ways of doing something. Then, as I’m sure any MOC builder knows, there’s the ‘Bricklink Delay’ – the time between figuring out what you want, finding it online, ordering it and it arriving. I’d keep an eye on the letterbox around 11ish, waiting for a bunch of pieces to arrive.
The boar’s heads
At the end of each eyebrow/wing sits a profile of a wild boar. In Anglo-Saxon culture, the boar was a symbol of strength and fertility (more on that here). Modelling a boar’s head in a 1x3 space was… tricky. I hope I’ve done it justice. The real helmet’s boars have three specific features; a beady eye, a pronounced tusk, and a snout. It’s those three things that I’ve taken and added to the model. If you squint and think ‘boar’, it sort of looks like one!
Heavy metal
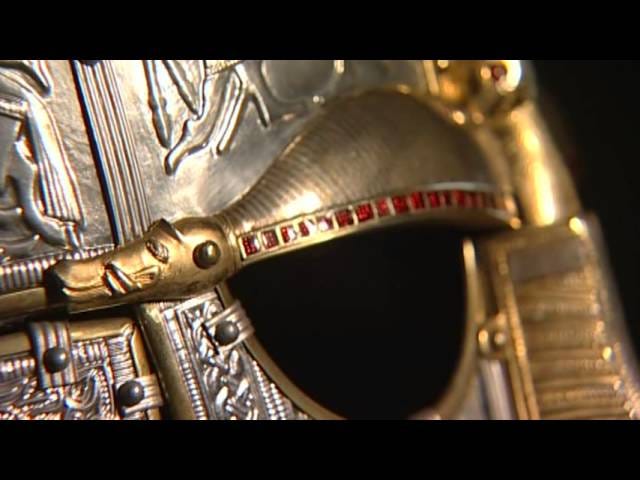
The original helmet (and the modern reproduction) would have glistened in the sun. The plates were made from tinned bronze, while the ‘gold’ sections would have been brass. The strips on either side of the main crest would have been gilded with gold.
I used a combination of gold pieces, both metallic and pearl gold colours, in the design. I even used some tan slopes at the bottom of the nose, I wanted to break up the colours to add a sort of chromatic texture to the build. Similarly, for the plate sections, I used dark grey for the main plates and light grey (and the odd old grey!) pieces for the edges.
I did consider buying 100 2x4 metallic tiles, but the cost would have been over £150 and at that point I wasn’t sure I’d even finish the build. I did, however, add some smaller metallic silver pieces to the face in the form of 1x1 quarter plates and grills, again, just for textural reasons.
So is it really wearable?
LEGO Ideas submissions are not allowed to contain any images of the submitter. You can understand why this is the case, there’s clearly a safety aspect there for young people. Of course, this means that my entry couldn’t contain some of the images above and an image of the finished helmet on a friend’s head. However, I can do so here, proving that the helmet is, in fact, wearable – if a little uncomfortable.
What’s next?
Well, the next thing is to start the marketing campaign and get to 100 votes in the next 59 days. Any Ideas suggestions that don’t hit that milestone are deleted. I can see why LEGO do this, it’s to weed out some of the less strong ideas. I hope the Sutton Hoo Helmet build is strong enough to get past 100 votes, and from there, the real work begins of getting to 10,000 votes.
So if you’ve made it this far, and enjoyed all this, please for King Rædwald, Basil Brown and Edith Pretty, head over to LEGO Ideas and vote! This button will take you there.
Finally, talking of the character associated with the helmet, my next update will explore the mini figure suggestions I made to accompany the build. So if you haven’t already, sign up now and get the next chapter in this journey straight in your inbox.
Thanks for reading.


Absolutely brilliant!!!
Hi Andrew, this is amazing! I'm a journalist with BBC East of England and we'd love to learn more about your project, if you'd like to chat please drop me an email at charlotte.ball02@bbc.co.uk. Looking forward to hearing from you! :)